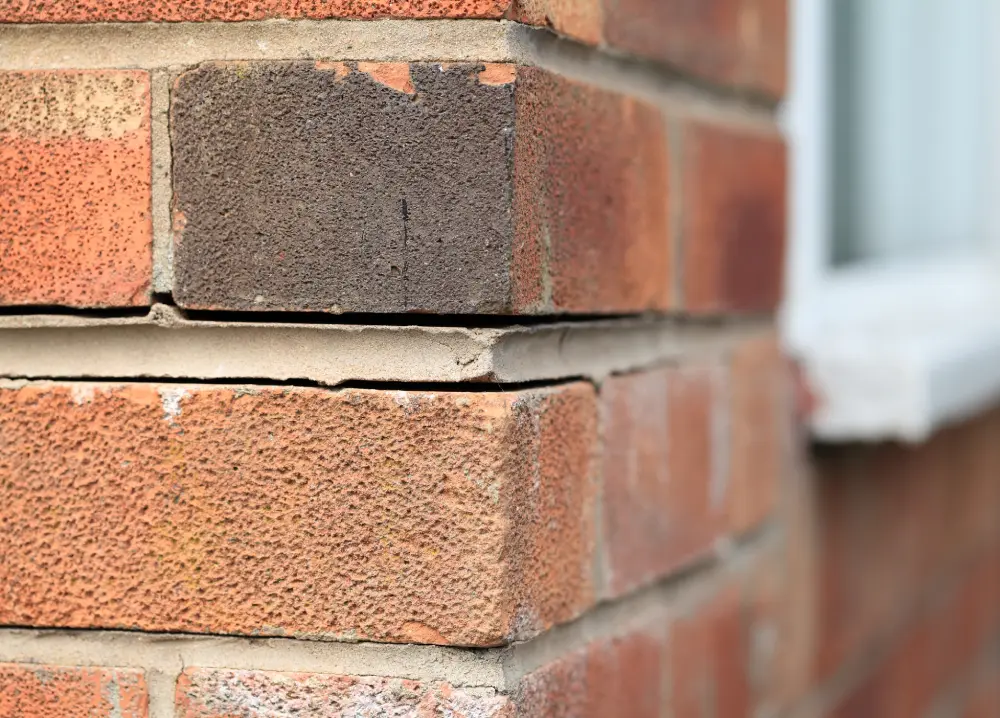
Hidden at the base of your brick walls, small openings play a crucial role in protecting your home from water damage. Weep holes are often overlooked during property inspections, yet they serve as the primary drainage system for moisture trapped within masonry walls.
Water infiltration in building structures is one of the leading causes of property damage in Australia. When moisture becomes trapped within wall cavities, it can lead to mould growth, timber rot, corrosion of wall ties, and significant structural degradation. Weep holes provide an essential escape route for this moisture, allowing water to drain out and air to circulate within the cavity.
Understanding how weep holes function, their requirements under Australian Standards, and how to maintain them properly can save homeowners thousands of dollars in repair costs and preserve the structural integrity of their buildings for decades to come.
Blocked or missing weep holes are one of the most common defects found during building inspections. This simple feature, when compromised, can lead to extensive water damage that is both costly and disruptive to repair.
What Are Weep Holes?
Weep holes are small openings intentionally left in the outer skin of masonry walls to allow trapped moisture to escape and enable air circulation within the wall cavity. These openings are typically located at the base of brick veneer walls, just above the flashing or damp-proof course, and are essential components of a building's moisture management system.
The term "weep" refers to the slow seepage of water through these openings, mimicking the way water might "weep" from a surface. While the amount of water that drains from properly functioning weep holes may appear minimal, their cumulative effect in preventing moisture buildup is substantial.
Purpose and Function
Weep holes serve two primary functions in masonry construction. First, they provide drainage for any water that penetrates the outer brick skin or condenses within the wall cavity. Second, they allow air to circulate through the cavity, promoting evaporation of moisture and helping to regulate humidity levels within the wall system.
Without adequate weep holes, moisture can accumulate at the base of the cavity, saturating the bottom course of bricks, damaging the damp-proof course, and eventually migrating into the internal structure of the building. This trapped moisture creates ideal conditions for mould growth and can accelerate the deterioration of timber framing, wall ties, and other building components.
Brick Veneer Construction
In brick veneer construction, which is the most common form of residential construction in Australia, a single layer of bricks is separated from the internal timber or steel frame by a cavity of 40 to 50 millimetres. This cavity acts as a drainage plane, with any water that penetrates the outer skin running down the back face of the bricks and collecting on the flashing at the base of the wall.
Weep holes positioned just above the flashing allow this collected water to drain to the exterior before it can cause damage. The cavity also requires adequate ventilation to prevent moisture buildup, which is achieved through the combination of weep holes at the base and ventilation openings near the top of walls.
Retaining Walls
Weep holes are equally important in retaining wall construction, where they serve to relieve hydrostatic pressure behind the wall. Without proper drainage, water pressure can build up behind retaining walls, potentially causing structural failure or significant movement. Weep holes in retaining walls are typically larger than those in brick veneer construction and may include drainage pipes or aggregate backfill to facilitate water removal.
Cavity Wall Construction
In double brick or cavity wall construction, where two skins of masonry are separated by an air gap, weep holes function similarly to those in brick veneer walls. They allow moisture to drain from the cavity and provide ventilation to help keep the cavity dry. Cavity walls are less common in modern Australian construction but remain prevalent in older properties and commercial buildings.
Australian Standards for Weep Holes (AS 3700-2018)
The design, installation, and maintenance of weep holes in Australia are governed by AS 3700-2018, the Australian Standard for Masonry Structures. This standard sets out specific requirements to ensure weep holes function effectively throughout the life of the building.
Compliance with AS 3700-2018 is mandatory for all new construction and renovations involving masonry work. Building inspectors assess weep hole installations against these standards during construction stage inspections and pre-purchase inspections.
Spacing Requirements
According to AS 3700-2018, weep holes must be provided at maximum centres of 1200 millimetres along the base of masonry walls. This spacing ensures adequate drainage capacity and allows sufficient air circulation throughout the wall cavity. In practice, many builders install weep holes at every third perpend joint, which typically equates to approximately 600 to 900 millimetres spacing, exceeding the minimum requirements.
Position and Height
Weep holes must be positioned directly above the flashing or damp-proof course, typically in the first course of bricks above ground level or above any horizontal surface such as a slab edge, window head, or lintel. The bottom of the weep hole should be level with or slightly above the top of the flashing to ensure water can drain effectively.
The standard also requires weep holes to be located at the head and sill of all window and door openings, above lintels, and at any other location where water may accumulate within the cavity. These additional weep holes prevent localised moisture buildup around vulnerable areas.
Size and Airflow
Weep holes must be of adequate size to allow both water drainage and air circulation. The minimum opening should provide an area equivalent to a 10 millimetre diameter circle. This can be achieved through open perpend joints (where mortar is omitted from a vertical joint), proprietary weep hole vents, or purpose-made openings.
Proprietary weep hole products, such as plastic weep hole vents or stainless steel mesh inserts, are commonly used to maintain the opening while preventing pest entry. These products must not restrict airflow or drainage capacity below the minimum requirements.
| Requirement | AS 3700-2018 Specification | Purpose |
|---|---|---|
| Maximum Spacing | 1200mm centres | Ensures adequate drainage along entire wall length |
| Minimum Opening Size | Equivalent to 10mm diameter circle | Allows sufficient water flow and air circulation |
| Position | Directly above flashing or DPC | Enables water collected on flashing to drain externally |
| Window and Door Openings | Required at head and sill | Prevents water accumulation around vulnerable areas |
| Above Lintels | Required at maximum 1200mm centres | Drains water collected above structural elements |
| Pest Protection | Vents or mesh permitted if airflow maintained | Prevents pest entry while maintaining function |
| Cavity Clearance | Minimum 25mm clear cavity required | Ensures unobstructed drainage and ventilation |
Concrete Placement Near Weep Holes
One of the most common issues encountered during building inspections is the improper placement of concrete surfaces in relation to weep holes. When concrete paths, driveways, or other hardstand areas are constructed too close to weep holes, they can obstruct drainage, prevent moisture escape, and direct water back into the wall cavity.
Minimum Clearance Requirements
AS 3700-2018 and related building standards require a minimum clearance of 75 millimetres between the top of any concrete surface and the base of weep holes. This clearance ensures that water draining from weep holes can fall clear of the structure and that surface water from paths and driveways cannot splash back into the openings.
In practice, building inspectors often recommend greater clearance where possible, particularly in areas prone to heavy rainfall or where garden beds or lawn areas may be installed adjacent to walls. A clearance of 100 to 150 millimetres provides additional protection and allows for future landscaping work without compromising weep hole function.
Common Installation Errors
During construction stage inspections and defect assessments, several common errors related to concrete placement near weep holes are frequently identified:
- Concrete paths poured too high, partially or completely blocking weep holes
- Garage or carport slabs constructed above the level of weep holes
- Raised garden beds or retaining walls built against the house without adequate drainage
- Paving stones or pavers installed too close to weep hole openings
- Render or texture coating applied over weep holes during external finishing
Rectification Options
If concrete has been placed too close to weep holes, several rectification options may be available depending on the specific circumstances:
- Cutting back the concrete edge to provide adequate clearance
- Installing drainage channels or grates to redirect water away from the wall
- Creating weep slots by cutting vertical grooves in the concrete adjacent to each weep hole
- In severe cases, removing and replacing the affected concrete sections
Weep Hole Maintenance
Regular maintenance of weep holes is essential to ensure they continue to function effectively throughout the life of the building. Neglected weep holes can become blocked with debris, mortar droppings, or pest nests, significantly reducing their drainage capacity and potentially leading to moisture problems within the wall cavity.
Regular Inspection Schedule
Homeowners should inspect their weep holes at least twice per year, ideally before and after the wet season. During these inspections, check each weep hole for visible blockages, damage to vents or mesh inserts, and signs of pest activity. Pay particular attention to weep holes located near gardens, trees, or areas where debris may accumulate.
Cleaning Methods
When blockages are identified, they should be cleared promptly using appropriate methods. For minor blockages caused by dust, dirt, or small debris, a stiff wire brush or pipe cleaner can be used to dislodge material from the opening. Work carefully to avoid pushing debris further into the cavity.
For more stubborn blockages, compressed air can be used to blow debris from the weep hole. Direct the air stream at an angle to encourage material to exit through the opening rather than being pushed deeper into the cavity. Commercial weep hole cleaning tools are also available, featuring flexible probes designed specifically for this purpose.
If mortar droppings have fallen into the cavity during construction and are blocking weep holes from the inside, a rigid wire or small hook tool may be needed to break up the material. In severe cases, it may be necessary to remove a brick to access and clear the blockage, then reinstall the brick with appropriate weep hole provision.
What Not to Do
Certain practices should be avoided when maintaining or working around weep holes:
- Never use sealants or caulk: Sealing weep holes completely defeats their purpose and will lead to moisture accumulation within the wall cavity.
- Avoid water blasting directly into weep holes: High-pressure water can force moisture deep into the cavity, potentially causing more harm than good.
- Do not paint over weep holes: Paint can block the openings and reduce airflow, even if some drainage capacity remains.
- Avoid storing items against walls: Materials stored against external walls can block weep holes and prevent proper inspection and maintenance.
Pest-Proofing Considerations
While weep holes must remain open for drainage and ventilation, they can provide entry points for pests including mice, snakes, spiders, and bees. Proprietary weep hole screens and vents are available that allow air and water to pass while preventing pest entry. These products are typically made from stainless steel mesh, plastic, or brass and are designed to fit standard perpend joint dimensions.
When installing pest-proofing products, ensure they do not significantly restrict airflow or drainage capacity. Products should be easily removable for inspection and cleaning, and should be made from durable materials that will not degrade over time.
Common Issues with Weep Holes
Building inspectors frequently encounter weep hole related issues during pre-purchase inspections, defect assessments, and construction stage inspections. Understanding these common problems can help homeowners identify potential issues with their own properties and take appropriate action.
Blocked Weep Holes
Blocked weep holes are the most common issue encountered, occurring when debris, mortar, paint, or other materials obstruct the openings. Blockages prevent water from draining and air from circulating, leading to moisture accumulation within the cavity. Signs of blocked weep holes include:
- Visible debris or mortar in weep hole openings
- Paint or render covering the weep hole location
- Pest nests or insect activity in openings
- Garden soil or mulch pushed up against the wall covering weep holes
Missing or Insufficient Weep Holes
Older properties may have insufficient weep holes due to construction practices that predate current standards. In some cases, weep holes may have been installed but were subsequently blocked during renovations or maintenance work. Missing or insufficient weep holes require professional assessment to determine the best remediation approach.
Improper Installation
Even in new construction, weep holes may be improperly installed due to errors during the building process. Common installation defects include:
- Weep holes positioned too far above the flashing, preventing effective drainage
- Spacing greater than 1200 millimetres between weep holes
- Weep holes blocked by mortar droppings in the cavity
- Flashing installed incorrectly, preventing water from reaching weep holes
- Cavity filled with debris from construction, obstructing drainage paths
Damage and Deterioration
Over time, weep hole vents and screens can deteriorate, crack, or fall out, leaving openings vulnerable to pest entry or complete blockage. Mortar around open perpend joints may crack and crumble, potentially blocking adjacent joints. Regular inspection can identify these issues before they lead to moisture problems.
Signs of Weep Hole Problems
When weep holes are not functioning correctly, moisture begins to accumulate within the wall cavity and may eventually manifest as visible signs on the interior or exterior of the building. Recognising these warning signs early can help prevent extensive damage and costly repairs.
Water Stains and Dampness
Water staining on internal walls, particularly at skirting board level or around windows and doors, may indicate moisture penetration from the cavity. These stains often appear as darker patches on painted surfaces or as tide marks where water levels have risen and receded. Dampness may also be detected through touch, with affected areas feeling cool and moist compared to surrounding surfaces.
Efflorescence
Efflorescence is a white, powdery deposit that appears on brick or masonry surfaces when water-soluble salts are drawn to the surface through capillary action and left behind as the water evaporates. While some efflorescence is normal in new brickwork, persistent or extensive deposits may indicate excessive moisture within the wall, potentially caused by blocked weep holes.
Musty Odours
A persistent musty or damp smell, particularly noticeable in rooms adjacent to external walls, can indicate mould growth within the wall cavity or on internal surfaces. Mould thrives in moist, poorly ventilated environments, making wall cavities with blocked weep holes ideal breeding grounds. These odours are often most noticeable after rain or during humid weather.
Peeling Paint and Wallpaper
When moisture penetrates from the cavity to internal surfaces, it can cause paint to bubble, peel, or flake, and wallpaper to lift or develop mould spots. These symptoms typically appear first at the base of walls or around windows and doors where moisture accumulation is greatest.
Mould Growth
Visible mould on internal wall surfaces, particularly in corners or at the junction of walls and floors, is a serious warning sign of moisture problems. Mould may appear as dark spots or patches and can pose significant health risks, particularly for individuals with respiratory conditions or allergies.
Structural Deterioration
In severe cases, prolonged moisture exposure can lead to structural deterioration including:
- Corrosion and failure of wall ties, compromising the connection between brick skin and frame
- Rot in timber framing, wall plates, and other structural elements
- Deterioration of the damp-proof course, allowing rising damp to develop
- Cracking or movement in brickwork due to ongoing moisture damage
How to Inspect Weep Holes
Homeowners can conduct basic weep hole inspections as part of regular property maintenance. While a comprehensive assessment by a qualified building inspector is recommended for detailed evaluation, regular visual checks can help identify obvious problems before they become serious.
External Inspection
Walk around the perimeter of your property, examining the base of all external brick walls. Look for:
- Weep holes at regular intervals, typically every third perpend joint or approximately 600 to 900 millimetres
- Clear openings or vents that are not blocked by debris, paint, or other materials
- Adequate clearance between ground level or concrete surfaces and weep hole positions
- Signs of water damage, efflorescence, or staining on the brickwork near weep holes
- Evidence of pest activity such as spider webs, wasp nests, or rodent droppings
Using a Torch and Mirror
A small torch and angled mirror can help you see into weep hole openings and assess whether they are clear. Shine the torch into the opening and use the mirror to view the cavity behind. Look for mortar droppings, debris, or other obstructions that may be blocking drainage or airflow.
Water Test
To test whether weep holes are functioning correctly, you can conduct a simple water test during or after rain. Observe the weep holes on the side of the building that was exposed to rain. Water should be visible dripping or weeping from the openings if the drainage system is working correctly. The absence of any water drainage, even after significant rainfall, may indicate blocked weep holes or problems with the flashing.
Internal Inspection
While inspecting weep holes, also check internal areas for signs of moisture penetration:
- Examine skirting boards and lower wall sections for water damage, staining, or mould
- Check around window and door frames for signs of moisture ingress
- Look for peeling paint, bubbling plaster, or other surface damage that may indicate moisture problems
- Note any musty odours, particularly in rooms adjacent to external walls
When to Call a Professional
While basic inspections can be conducted by homeowners, professional assessment is recommended in the following situations:
- Evidence of significant moisture damage or structural issues
- Missing or insufficient weep holes requiring installation
- Blocked weep holes that cannot be cleared with simple cleaning methods
- Pre-purchase inspection to assess the overall condition of moisture management systems
- After construction or renovation work to verify compliance with standards
Frequently Asked Questions
Can I install weep holes myself or do I need a professional?
Short answer: Installing new weep holes in existing brickwork should be done by a qualified builder or bricklayer to ensure compliance with Australian Standards and avoid structural damage.
Creating weep holes in existing walls requires careful removal of mortar from perpend joints without damaging surrounding bricks or compromising wall stability. The work must comply with AS 3700-2018 requirements for spacing, size, and position. Incorrectly installed weep holes may not function effectively and could potentially create new water entry points. A professional can also assess whether additional work, such as flashing installation or cavity cleaning, is required for the weep holes to function correctly.
How do I maintain my weep holes throughout the year?
Short answer: Inspect weep holes at least twice per year, clear any debris with a wire brush or compressed air, and ensure landscaping does not obstruct the openings.
Schedule inspections before and after the wet season to identify and address any blockages. Keep garden beds, mulch, and soil at least 75 millimetres below weep hole level. Trim vegetation that may grow across weep holes and remove any debris that accumulates against external walls. If weep hole vents or screens are installed, check that they remain securely in place and are free from damage. Avoid storing items against external walls that could block weep holes or prevent inspection access.
What Australian regulations apply to weep hole installation?
Short answer: AS 3700-2018 (Masonry Structures) is the primary standard governing weep hole requirements, with additional requirements in the National Construction Code and state building regulations.
AS 3700-2018 specifies maximum spacing of 1200 millimetres, minimum opening size equivalent to a 10 millimetre diameter circle, and positioning directly above flashing or damp-proof courses. The National Construction Code references AS 3700 for masonry construction requirements. State and territory building regulations may include additional requirements or variations. Compliance with these standards is mandatory for all new construction and is assessed during building certification inspections. Non-compliant weep hole installations may require rectification before a certificate of occupancy is issued.
Can weep holes be retrofitted to older homes?
Short answer: Yes, weep holes can be retrofitted to older properties, though the process requires careful assessment and professional installation to ensure effectiveness.
Retrofitting involves removing mortar from selected perpend joints at appropriate spacing and heights. Before installation, a building professional should assess the existing flashing and damp-proof course condition, as weep holes will only function correctly if water has somewhere to drain from. In some cases, additional work such as flashing installation or cavity cleaning may be required. The cost of retrofitting depends on the extent of work required and property access, typically ranging from $500 to $2,000 for a standard residential property.
Will weep holes allow pests to enter my home?
Short answer: Weep holes can provide entry points for pests, but purpose-designed weep hole screens and vents are available that prevent pest entry while maintaining drainage and ventilation.
Proprietary weep hole products made from stainless steel mesh, plastic, or brass allow air and water to pass while blocking mice, snakes, spiders, wasps, and other pests. These products are designed to fit standard perpend joint dimensions and can be installed in new construction or retrofitted to existing weep holes. When selecting pest-proofing products, ensure they do not significantly restrict airflow or drainage capacity. Regular inspection is still required as some determined pests may attempt to push through or build nests on the exterior of screened openings.
What happens if my weep holes are blocked?
Short answer: Blocked weep holes prevent moisture drainage from the wall cavity, potentially leading to water damage, mould growth, timber rot, wall tie corrosion, and structural deterioration.
When weep holes are blocked, water that enters the cavity through the outer brick skin has no escape route. This moisture accumulates at the base of the cavity, saturating bricks and potentially breaching the damp-proof course to affect internal areas. Over time, the persistent moisture creates ideal conditions for mould growth within the cavity and on internal surfaces. Timber framing and wall plates exposed to moisture may rot, while metal wall ties can corrode and fail. The resulting damage can be extensive and costly to repair, often requiring removal of brickwork to access and remediate affected areas.
How much does it cost to repair or install weep holes?
Short answer: Basic weep hole clearing costs $100 to $300, while installation of new weep holes typically ranges from $500 to $2,000 depending on the extent of work required.
Simple cleaning of blocked weep holes using wire brushes or compressed air can often be done during a routine building inspection or maintenance visit at minimal additional cost. Installing new weep holes requires removal of mortar from perpend joints and may include installation of weep hole vents or screens. If flashing replacement or cavity cleaning is also required, costs increase accordingly. Where moisture damage has occurred due to failed weep holes, remediation costs for mould treatment, timber repairs, and wall tie replacement can run into tens of thousands of dollars.
Should weep holes be visible in a brick wall?
Short answer: Yes, weep holes should be visible as open joints or vented openings at regular intervals near the base of brick walls and above windows, doors, and lintels.
Weep holes are typically formed by leaving the mortar out of selected perpend (vertical) joints in the brickwork. These open joints should be clearly visible on inspection. Where proprietary weep hole vents are used, the plastic or metal insert should be visible in the perpend joint. If weep holes are not visible, it may indicate they were never installed, have been blocked with mortar or debris, or have been covered by paint or render. Any of these situations warrants further investigation by a building professional.
Do all brick homes have weep holes?
Short answer: All brick veneer and cavity wall construction should have weep holes, though older homes built before current standards may have fewer or no weep holes installed.
Modern construction standards require weep holes in all masonry cavity wall construction. However, homes built before the introduction of AS 3700 or its predecessor standards may have been constructed without weep holes or with insufficient provision. Some solid brick construction (double brick with no cavity) does not use weep holes in the same way, instead relying on render or other waterproofing methods. When purchasing an older property, a building inspection should assess whether weep hole provision is adequate and recommend remediation if required.
Key Takeaways
- Weep holes are essential openings at the base of masonry walls that allow trapped moisture to drain and air to circulate within the wall cavity.
- AS 3700-2018 requires weep holes at maximum 1200mm spacing, positioned directly above flashing or damp-proof courses.
- Concrete surfaces must maintain a minimum 75mm clearance below weep holes to ensure effective drainage.
- Regular maintenance including twice-yearly inspections and cleaning with wire brushes or compressed air keeps weep holes functioning effectively.
- Never seal or paint over weep holes, as this prevents drainage and ventilation.
- Signs of weep hole problems include water stains, efflorescence, musty odours, peeling paint, and mould growth.
- Pest-proofing products can prevent entry while maintaining weep hole function, but must not restrict airflow or drainage.
- Professional assessment is recommended for blocked weep holes that cannot be cleared, retrofitting to older properties, or when moisture damage is evident.
References and Resources
- Standards Australia (AS 3700-2018 Masonry Structures)
- National Construction Code (NCC)
- Think Brick Australia
- CSIRO (Commonwealth Scientific and Industrial Research Organisation)
- NSW Fair Trading
- Queensland Building and Construction Commission (QBCC)
- Victorian Building Authority (VBA)
Concerned About Weep Holes or Water Damage?
Our qualified building inspectors can assess your property's weep holes, identify moisture problems, and recommend appropriate solutions. Protect your investment with a comprehensive building inspection.
Book a Building Inspection